Wednesday, November 30, 2011

Winter Wonderland Giveaway: Huffleblossoms


It's time for the Winter Wonderland Giveaway! This is a huge giveaway event that has been put together by the amazing Brooke, who you may know better as Untrained Hair Mom.

For this event, Tweeny Hair is hosting a giveaway that is near and dear to my heart. We are giving away a set of 9 handmade hair accessories from a brand new business called huffleblossoms. Why is that so near and dear to me? That's easy.....because I'm the one making them!

That's right, Syd and I are launching a new line of hair accessories that will be for sale beginning in January. But the winner of this giveaway will have NINE huffleblossoms flower accessories worth $47!

I'll tell you more about huffleblossoms as we get closer to January, but for now you can take a look at the nine flowers that are up for grabs in this giveaway. You can see each flower individually (along with a detailed description of each one) when you head over to the new huffleblossoms facebook page, which can be found here.

These four flowers are actually made out of duct tape!
These are different sized ruffle flowers, with the medium sized one created with fabric promoting Autism Awareness.
These two are different variations of kanzashi flowers.
This giveaway will run from December 1 - 6. To enter, you can simply use the rafflecopter form below. The winner will be announced December 7.

Be sure to head over to Untrained Hair Mom after you enter here! Not only can you enter to win her prizes, but the Winter Wonderland Grand Prize entry form is on her site, as well. You don't want to miss this!




Wordless Wednesday: Making Baba Smile


Monday, November 28, 2011

Twist - Twist Out - Retwist

Syd has been wearing a LOT of twists lately. It's quickly becoming her signature style. Here's a picture of some medium sized twists she wore last week:

She only wore those twists for one day because we wanted a big, full twist out for our Thanksgiving get together with my family. It was almost painful to remove such pretty twists when they were still looking so good! Luckily, it made for a wonderful looking twist out.


She wore that twist out for two days, but we had to twist her back up because this week is going to be a busy, rainy week and we won't have much time to worry about hair.

Since her twist out was still really defined when I was doing a new set of twists, I decided to let the definition help me out. I simply grabbed each tendril that resulted from the first twists, lightly misted it with just water, and twisted. Her hair still had enough product in it from the first twists, so we didn't have to add any more product.
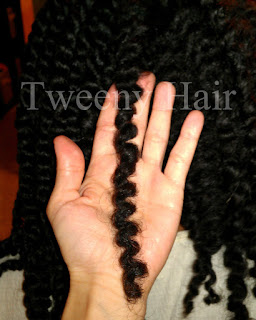
Each defined section of hair went from this...

...to this!
Since each twist from the first set made two defined tendrils, the second set of twists had twice the number of twists as the first one did. Here was the final result:


These 78 twists (yes, we counted) should definitely get us through the week. Maybe even longer!

Thursday, November 24, 2011

Thanksgiving Fun!

Happy Thanksgiving, everyone! I hope you all had a great day!

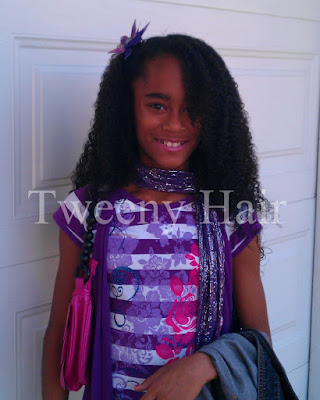
Check out this picture....Syd was looking fabulous today. She's always thrilled to let her big hair come out to play.

We had a wonderful day with family. Now we're back home and somehow found ourselves playing with the webcam. I thought I'd share some of our fun pictures. Enjoy!


Friday, November 18, 2011

Sharing the Spotlight: Sophisti-Web-Bun by Beautiful Biracials

Today's spotlight is shining on a style done by Latorria and her daughter, Princess. You may know them from their website, Beautiful Biracial.

Latorria writes:
"Here's a style that can be done for girls at any age. I call it the 'Sophisti-Web-Bun because it's webbed into a bun (obviously lol). This style is definitely for more formal occassions. The flower is completely optional of course."


This style is great because it's can be age appropriate for girls of all ages. And you just can't go wrong with a big flower! Thanks for sharing!

Be sure to head over to Beautiful Biracial to see more styles and get some great hair care info!

We're always looking for styles to put in the spotlight. Check out the Contribute tab at the top of the page to see how your style can be featured!

Tuesday, November 15, 2011

Wordless Wednesday: Pillow Hair


Box Braids and Curlformers

Syd has been wearing her box braid style for over a week now. She has worn them down almost every day, so there hasn't really been anything interesting to share. Eventually, though, she got bored with the same hairstyle every day and asked me to put her braids into Curlformers.

Usually, we put Curlformers in while her hair is wet and she sleeps in them overnight. I was curious and wanted to know what would happen if we just added a bit of product to her dry hair and then used the Curlformers. So that's what I did. Just a bit of a product with hold onto dry hair and then I put 3 braids into each Curlformer.

Sneaking a brownie with a head full of Curlformers :)

She slept in the Curlformers and we removed them in the morning. Since we started with dry hair, the braids did not curl all the way up to the root like they do when we start with wet hair. Instead, only the bottoms of the braids were curly. Still looked great...especially since this was day 9 of these braids!

We pulled the front part of her hair back into a half-up, half-down style and added a big pink flower. Super cute!

It's definitely getting colder...she's wrapped in a blanket every morning!

And just for fun, I decided to share this picture I snapped of Syd during a dance party with my home daycare kids. Look at those braids fly!


Monday, November 14, 2011

Hair Care in Winter


See that? That picture is proof that winters where we live aren't always nice to us. Snow shovels, boots, and lots of layers are necessities. So are changes to our hair care routine.

Some people completely change the way they take care of their hair every time the season changes. Luckily, Syd's hair isn't that particular, but we do still need to make a few changes to keep her locks at their best. I thought I'd share those little changes in case you find yourself working with a head of unhappy hair this winter.

1. Less Shampoo, More Co-washes
 During the spring, summer and fall, Syd shampoos her hair about once per week and co-washes if needed in between. During the winter, we step up the co-washes to at least once per week and reduce shampoo washes to just once ever two or three weeks.

2. Extra Moisture
Winter air is cold and dry. As a result, Syd's hair needs more moisture during the winter months. We just add a daily leave-in before she leaves for school in the morning, paying extra attention to the ends.

3. More Protective Styles
We keep Syd's hair in more protective styles in the winter than we do during the rest of the year. These styles include cornrows, box braids, and twists. She almost never wears a wash-n-go style in the winter and twist/braid outs are rather rare during those months, as well. Manipulating her strands as little as possible is a big part of keeping her hair happy during those cold, dry months.

4. Choose Hats Wisely
When the temperatures dip down below the freezing mark, hats become necessary. But this doesn't mean your hair has to suffer. There are some amazing satin lined hats out there. Unfortunately, they often cost more than I am willing to pay. But a few years ago, I came up with a cheap and easy fix. I bought a satin sleep bonnet at Walgreens and sewed it into the inside of Syd's hat. It didn't look perfect, but let's face it...nobody ever looks at the inside of someone else's hat!

These few little tricks are usually all it takes to keep Syd's hair soft, happy, and healthy all winter long. If you have any other tips or tricks, be sure to comment and share your info with me and other readers!


Friday, November 11, 2011

Happy Veteran's Day!


Let's prove the picture wrong. 

Yes, today's date is a once in a lifetime kind of thing. Pretty cool. But today is something so much bigger.

Take time out of your day today to thank a vet and remember the sacrifices they make. Our veterans are our heroes. 

To all who have served, THANK YOU!

Tuesday, November 8, 2011

Sharing the Spotlight: Cornrow Style from Mainly Braids

Today's spotlight is shining on this amazing cornrow style from Mainly Braids. Mommy Shay did the style on daughter A, and I love the design. I think I might have to snag this style for Syd's head at some point. Check it out!


If you're not a follower of Mainly Braids, I highly recommend heading over there and clicking that follow button. Her styles are creative and range from quick and easy to more complex and time consuming. An extra bonus? She even posts meal plans and recipes! How great is that?!? Be sure to check it out!

I love sharing the spotlight, but I need help from you readers. If you have a style that you would like to share, please send it in so the spotlight can shine on you! Click on Contribute at the top of the page for more details.

Sunday, November 6, 2011

Box Braids

Since I haven't been physically well lately, I haven't been up to spending much (or any) time doing hair. As a result, Syd's hair has been in a twists-twist out-repeat cycle. Today I was finally feeling a little better, so I decided to end that cycle.


We opted to do some box braids, which I'm hoping will last until my health is back at 100%. The braids are also a good choice for right now because the weather here is supposed to be colder, rainy, and windy for a while. Box braids hold up better than most other styles in weather like that.

I started by moisturizing her hair with Curls Creme Brule and then banding it with ouchless bands overnight. Yes, the parts are crazy, but I only used my fingers since I knew the bands were coming out in the morning.

When the bands came down in the morning, we had to leave for church so I put her hair into one big braid. And then I forgot to take a picture of it. Sigh.

When it came time to start the box braids, I started at the back and made my usual crescent shaped parts for her braids. You can click here to see a post that explains this parting method.

When I got to the top, I added a slightly angled side part. This disrupts the uniform crescent shaped parts, but I'm never worried about that. They braids lay nicely enough to hide the awkward parts.

Since I didn't want to spend all day on this style, I made the braids a little bigger than I normally do. When we were finished, there were 68 braids and it took right around 4 hours with a couple very short breaks to stretch our legs. Once the braids were finished, I added a little Bee Mine Luscious Moisturizer to the ends, which will also curl up more once they get wet. Here was the final result.
 

Tuesday, November 1, 2011

Halloween Hair

Let be start off by apologizing for my absence recently. I've been struggling with some health issues and hair/blogging has been knocked down a few pegs on the priority list. Syd has only been wearing two strand twists and twist outs for the last couple of weeks, but we'll get back to doing more fun hairstyles soon.

And now....on to our Halloween Hairstyle!


Syd dressed up as the Mad Hatter this year. The pictures in this post were taken just before she headed out to a costume party.

Since the Mad Hatter is actually male, I didn't really have a specific hairstyle to try to pull off. I didn't even have a plan when it came time for the style...I just sat down with some bobby pins and started using them.

We began with Syd's standard style, a basic two strand twist out.

I pulled the top back into a standard half up - half down style and secured it with an ouchless band. Then I divided the hair in that band into 4 sections. I twisted each section around itself and pinned them into place. It ended up reminding me a little of a four leaf clover. I then added the top hat just in front of the clover shape, pinning it into place with a few bobby pins.

I have a couple of pink clip-in human hair extensions, so we decided to use those for this style to make it look a little more eclectic. I used Curlformers to curl them, but the extensions didn't have enough time to dry completely and the curls were still much looser than her twist out pattern. One was actually still so damp that it lost almost all the curl within an hour. Oh well...that just added to the fun look.
She had a blast at the party and her hair held up the entire night, despite the fact that she spent quite a bit of time jumping on a trampoline. Thank goodness I used more bobby pins than I thought I needed!

This costume fits her personality PERFECTLY! I love it!


Photobucket

Got Halloween photos to share? Get the linky code and link up!

LinkWithin

Related Posts Plugin for WordPress, Blogger...