Showing posts with label braid out. Show all posts

Thursday, October 13, 2011

Syd Gives Herself a Braid Out

By now, Syd has become a pro when it comes to washing and detangling her hair without assistance from Mom. Unfortunately, she's not able to do many styles on her own. We decided to work on that and Syd did a braid out by herself for the first time.

She started by removing her Breast Cancer Awareness style. It had been in for about a week and a half and was very fuzzy. Her hair was still clean and didn't have any build up, so we moved straight from one style to the other without a wash in between.

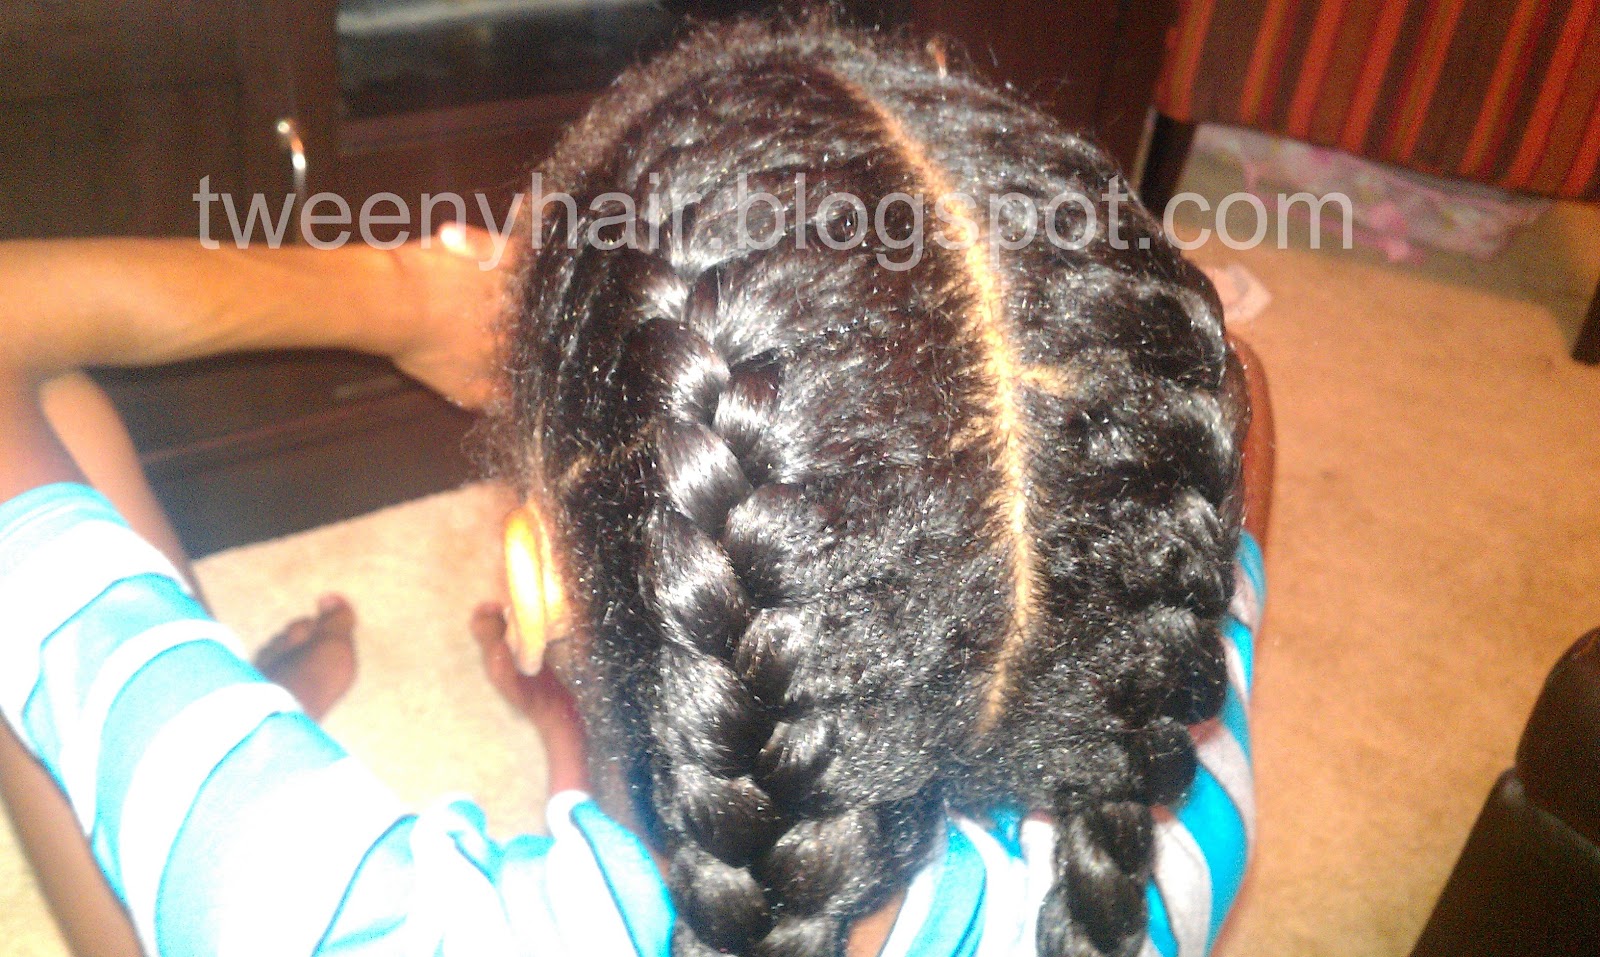
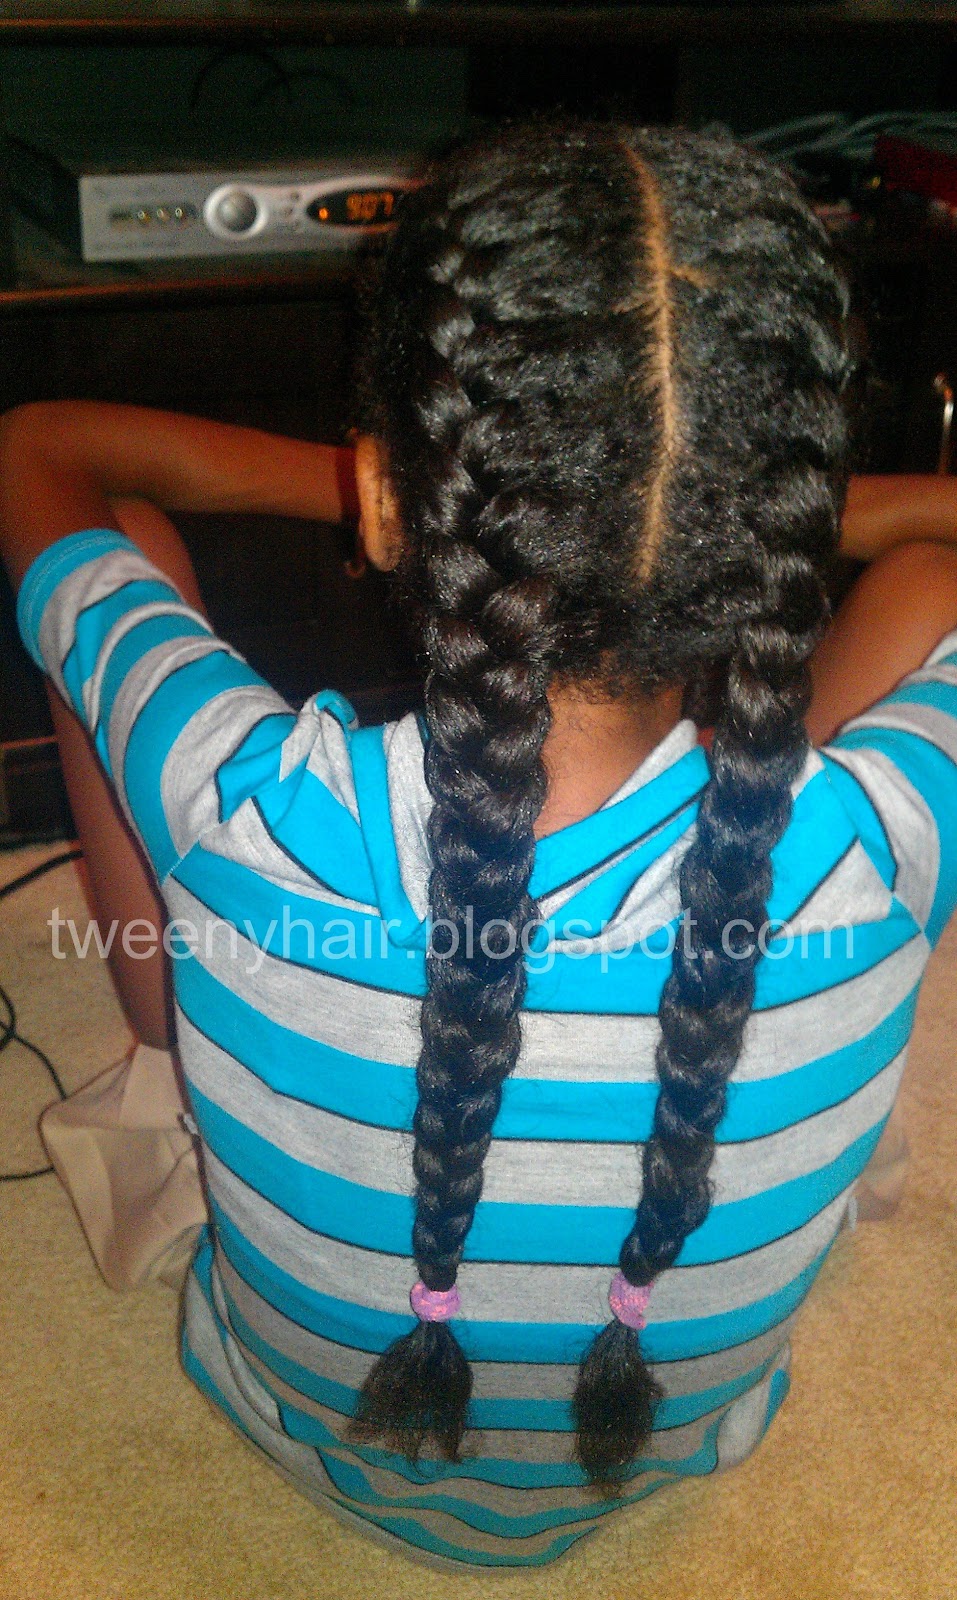
I told her not to remove the entire style right away. She has a lot of hair and I thought it would be easier to work in sections, so she started by only removing the back section of the style. Then she split the back in half, putting the left part into a big loose braid to keep it out of the way. She focused on the back right section of hair first.

Now I had her divide that section of her hair into fourths again so that there will be four braids made out of this section. Just before braiding each section, she dampened it with a spray bottle and added a bit of Curls Creme Brule. Then she finger detangled, ran her denman through the section to distribute the product evenly, and braided it up. I stressed to her that she needed to start the braid as close to her scalp as possible and keep the braid tight all the way down.


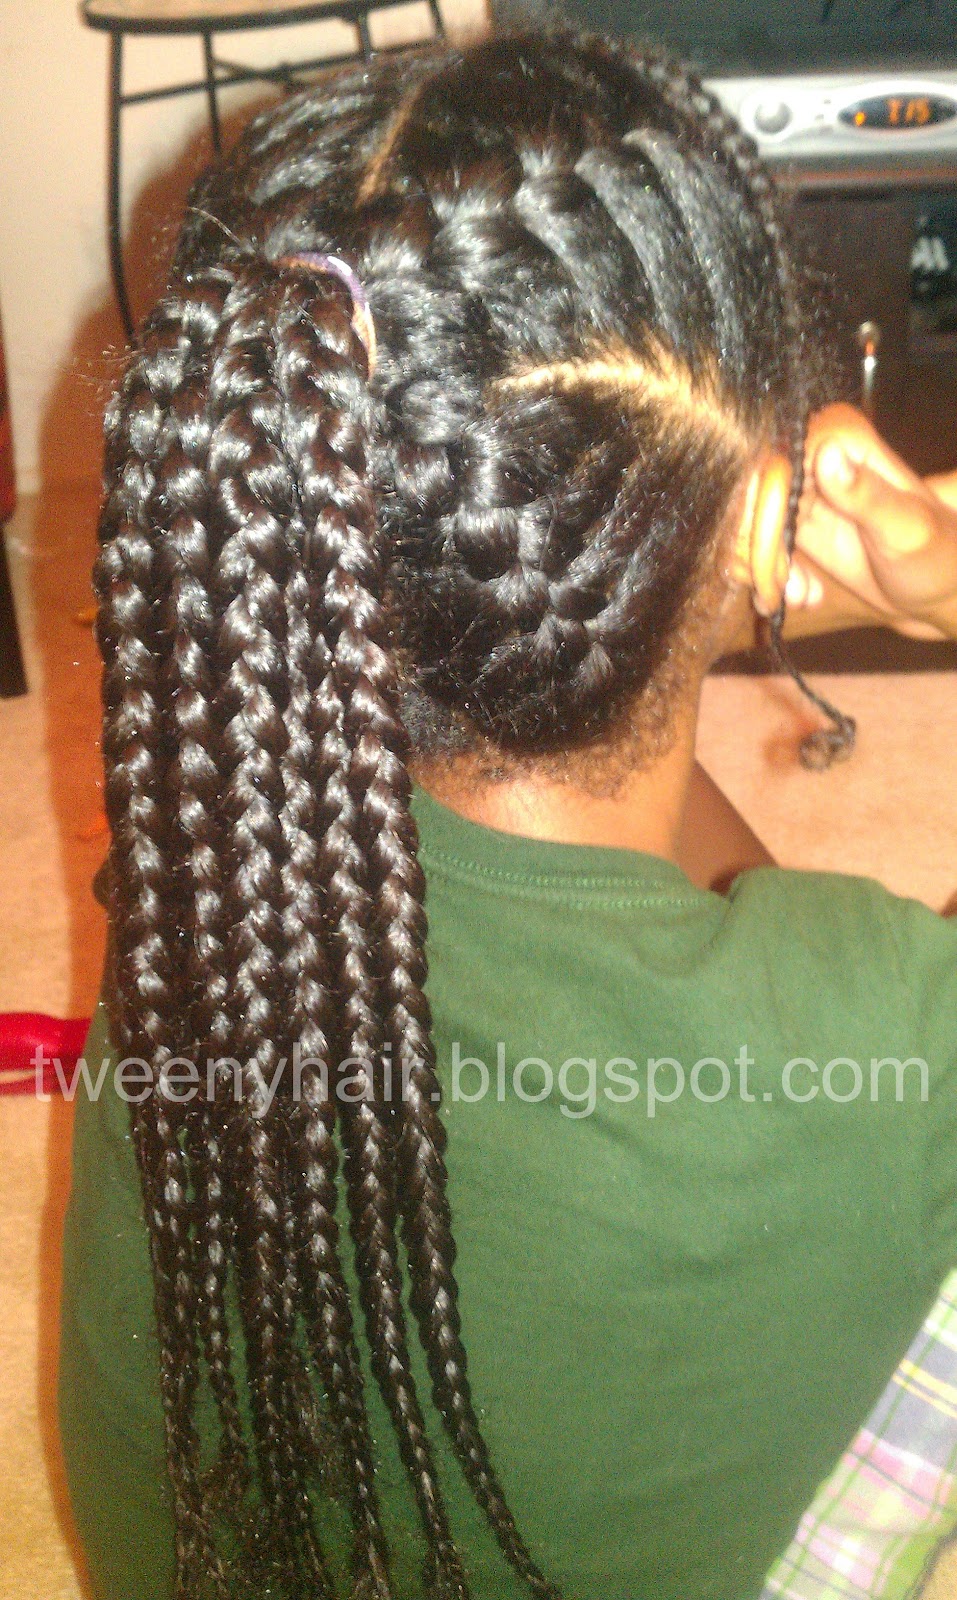
Before long, that back right section was in four braids.

She did the same thing to the back right section and then moved up to the top, where the process was the same.


After what she said felt like forever (although the whole thing took less time than I expected), she put the last braid in.

She slept in those braids and removed them before school the next morning. I didn't get pictures of the removal process. We were a little rushed getting ready for the day, but she got the braids out while keeping most of the definition.

Since she had a hard time getting some of the braids close to her scalp, her roots were pretty fuzzy. She pulled the front half up, secured it with an ouchless band, and headed off to school.

Braid out success!


Wednesday, October 5, 2011

Cornrow Braid Out

Syd hasn't been wearing her hair down very often lately. She has been very active and it's just easier to keep her hair braided to keep the tangles down. But if you've been reading for any length of time, then you're probably aware of Syd's love affair with big hair. So since we were planning to have a lazy weekend, I decided to give her a braid out for about a day and a half before I braided her Breast Cancer Awareness style.

We usually prefer the look of cornrow braid outs over braid outs that come from individual braids, so I put Syd's hair into 8 quick cornrows. There were only 4 across, but I split them in half with a part from ear to ear because I had dampened her hair before cornrowing and I wanted to use less hair in each cornrow so it could dry completely. They were a little fuzzy in this picture because she had just slept on them.

In the morning, I removed the cornrows. I was a little disappointed because her hair was still damp in some places, despite the fact that it hadn't been very wet the night before. We knew that her hair would get big and frizzy throughout the day, but neither of us are put off by big frizzy hair.

We were going to be outside for a lot of the day, and Syd didn't want her hair in her face, so we pulled the front part up with an ouchless band.

As it turns out, we didn't have that lazy weekend we had planned, but we did get some good quality time together. Here are a couple shots from our adventures that weekend. You can see that Syd's hair did, in fact, get a little poofy. And with the added volume (poofiness), we both thought it looked fabulous. :)

Syd was the navigator as we went through a couple miles of corn maze. :)
She was trying to reach those batons while hooked to a bungee cord in the back. Look at that determination on her face! FYI - She got all of the batons. If Syd has a goal, she WILL reach it! LOL

Friday, September 30, 2011

Sharing the Spotlight: French Braid Out on Rae

Yep, you read that right. I'm putting myself in the spotlight today. Forgive the poor quality of the pictures. I discovered that it's really hard to take a picture of myself from behind and, of course, Syd wasn't home to help. Go figure. So it was just me, my mirror, and my camera phone.

After wearing my hair in a ponytail every day for almost 2 weeks, I decided it was time to do something different. My natural hair is very thick, coarse, frizzy, and has enough body to almost be called wavy. You can't quite call it wavy, but you can't quite call it straight, either. It's really hard to wear it down without doing something to either straighten it out or make more defined waves/curls. I didn't want to grab the flat iron, so I decided to give myself a braid out instead.

I started in the evening with clean, damp hair. I didn't add any styling product, mostly because I'm running low on almost everything and wanted to save the product for Syd's hair. :)  I used my finger to part my hair into two sections. I didn't even try to make the part straight because I knew the braids were coming down in the morning. I french braided each side and secured the ends with rubber bands.


In the morning, my hair still wasn't completely dry. I left the braids in for about an hour after I woke up, but knowing I had that crazy crooked part on my head was driving me nuts so I went ahead and removed the braids. It was almost completely dry by the time the braids came out. The top was laying funny, so I pulled the front back with a clip and this was the result.


That picture was taken a couple of hours after the braids were removed. The wave pattern was a little tighter right after the braids came down, but it fell a little since I hadn't used any products with hold and my hair wasn't dry when the braids were taken out. Regardless of all that, I liked the results a lot. 

Do you have a style you'd like to share? If so, click on Contribute at the top of the page to learn how you and your style can be in the spotlight.

Monday, September 5, 2011

Two French Braids

Syd wore her hair in various french braid styles for over a week. Here's the last one we did before washing her hair and changing to something completely different.

She still had that single cornrow along the front of her hairline (that one cornrow stayed like that for over a week and a half!). I left that alone and made a part down the center of her head. Then all I did was french braid each side and secure the ends with an ouchless band. Easy peasy!


After about two days, we removed the french braids. The braid out wasn't very defined, although these pictures seem to show more definition than there actually was (how does that happen?). The lack of definition was probably because I had only used moisturizer before braiding instead of using something with hold. Regardless, we threw her hair up into ponytail and went on our way for the day.


After this style, it was time for that front cornrow to finally come down and for her hair to get washed. Stay tuned for what came next!

Wednesday, August 31, 2011

French Braided Ponytail

Remember last weekend when I said in this post that I would band Syd's hair at night and then throw it up into a quick style every morning? It was a great idea. Unfortunately, I didn't follow through. Instead, I did a different kind of ponytail that she wore for a few days.


The very front of Syd's hairline was still in a single cornrow, as seen back in the post mentioned above. I just left that alone, since it still looked good. I divided the rest of her hair into 4 sections, with one part going from front to back and another one going from ear to ear.

I french braided each section toward the center where the parts intersected.


When all 4 sections had been french braided, I joined them into a ponytail. The ponytail consisted of 3 tendrils of hair from each of the 4 french braids. I braided each tendril, resulting in a ponytail made of 12 individual braids.


After 2 days of that style, we removed the individual braids but kept the french braids and she had a great looking braid out ponytail.


I've done countless cornrow ponytails through the years, but this was the first time I had ever even thought of using french braids instead. I think I'll have to explore this more...I love the way it looks!

Thursday, April 14, 2011

Twists, Braids, and Outs

Syd and I have had a full, hectic schedule lately. On the rare occasion that we get a few hours at home to relax, we'd rather sit down with a game of Uno or go for a bike ride than spend all of our free time on hair. As a result, we've been quickly putting Syd's hair into thick braids or twists at night and letting her wear the braids for a couple days, and the resulting "out" afterward.

Here's a look at her hair for the past week:

For the picture below, we had just put Syd's hair into about 10 thick two strand twists the night before. They didn't dry all the way through, so we knew the twist out was going to be fluffy and big. I put a flat twist along her hairline and pulled it back to join the rest of the hair in a fluffy ponytail.

That night, I put thick cornrows in Syd's hair. I parted the hair so I could do 5 cornrows, but I decided to split the 3 middle ones in half and turn each section of hair into 2 cornrows. That way, all the cornrows ended up being about the same size.
These braids could have lasted several more days, but we removed them after a day because Syd wanted the braid out. Here's the braid out after being in a low ponytail all day at school.

Next, we did the cornrow style below. I gave her a braided headband first, and then braided the rest of the hair into a ponytail. It looks really fuzzy in the picture because she had worn it for a couple days and I forgot to take a picture of it until right before I took the braids down. If you look closely, you can even see that I had already removed the ponytail holder!
This morning, I took out the cornrows that formed the ponytail and left the braided headband in. Here is that braid out.
Don't mind the crazy eyes in that last picture. I wanted to show you what it looks like with the headband still in from the front. We'll probably just pull the back into a ponytail tomorrow. And I may or may not do a more long-term style this weekend. We'll see!

Oh, and I had to share this just-for-fun picture of Syd on the last day of her side cornrow style. She was wearing a dress and had some quarters but no pockets to put them in. This was the solution she came up with. She's so funny (but very resourceful)!

Wednesday, February 23, 2011

Hair That's Fit To Travel

A little late, but Happy New Year from Syd and friends!
 At the end of last year, Syd and I drove from our home in the Midwest to South Carolina (15 hours away) to ring in the new year with some of our dearest friends. Since we only had a few days to spend there, I didn't want to waste a moment doing Syd's hair for our New Year's Eve celebration. So I needed to find a style that would survive 15 hours in the car and still look fabulous on New Year's Eve, which was 2 days after we arrived in Charleston.


I decided on cornrows for the trip since they could easily survive a 15 hour drive without frizz or tangles. I gave her a braided hair headband by putting 2 cornrows all the way around her hairline. They met at the nape of her neck. Then I put the remaining hair into 6 cornrows going straight down. To spruce up the cornrows while they were in, we pulled them into a low ponytail and added a giant flower, but I forgot to take a picture of that. Oops!


When New Year's Eve rolled around, I removed the 6 cornrows that went straight back and left the 2 that formed the braided headband. Cornrow removal only took a few minutes and the result was a braid out that looked great for NYE.

In this picture, you can still see the parts from where the cornrows were. Just a little fluffing of the roots with my fingers took care of that.


Random sidenote: It's tons of fun to tickle your kid while taking pictures. =]

LinkWithin

Related Posts Plugin for WordPress, Blogger...