Friday, May 27, 2011

Sharing the Spotlight: Mohawk Style by Diva's Hairdresser

Today we are featuring a style that comes to us from Diva's Hairdresser. She said it was her first attempt at a mohawk style and I think it turned out wonderfully! Take a look:


I absolutely love this look! Check out more of their styles by heading on over to their blog at divalocks10.blogspot.com.

If you would like to share one of your hairstyles on Sharing the Spotlight, get all the details by clicking on Contribute at the top of the page.

Monday, May 23, 2011

Half Up with Cornrows and Twists


For this style, I parted Syd's hair from ear to ear so I could work with just the front part of her hair. I made a center part and then started parting and cornrowing down each side, with my parts moving out to a subtle point and then back toward the center. When I completed both sides, I pulled the cornrows back and secured them with an ouchless band. The cornrows were only braided until they reached the ouchless band.

I then put the hair coming from the ponytail into 2 strand twists. I also twisted the remaining hair at the back of her head. Usually when we have styles similar to this one, the twists get removed for a twist out after a few days. I have no doubt that will happen again this time, as Syd loves wearing her hair out.


Friday, May 20, 2011

Sharing the Spotlight: Cornrow Style by Brown Girls Hair

Today's spotlight is shining on this beautiful cornrow style shared by the author of Brown Girls Hair. Step by step instructions are available here.


Be sure to head on over to http://browngirlhair.blogspot.com to see more styles and hair care information. Thanks for sharing!

If you would like to see one of your styles featured on Sharing the Spotlight, click on Contribute at the top of the page to get all the details!

Tuesday, May 17, 2011

"I need to look old-fashioned"

When it comes to Syd's hair, I really feel like I've been slacking in the creativity department lately. A lot of that is due to our lack of time to invest in an elaborate hairstyle. But this week, we had a different situation limiting us. Syd is spending her entire day at the State Capital building reenacting scenes from the 1800's for the general public. The goal is to make it seem as authentic as possible. After 4 months of practice and so much attention paid to all the costume details, an intricate style would just not be appropriate. When I asked Syd what she thought we should do, all she said was "I need to look old-fashioned."


My first thought was just to do two simple braids, but Syd really isn't a fan of that style anymore. I still did two braids, but we jazzed it up just a little. I started by making a center part and putting cornrows along the hairline.


In the back, I just pulled the two sides into low pigtails and braided them. To add a little interest, I didn't just put one big braid on each side. I sectioned each side into three braids and then braided those braids together.


The style only took a few minutes (as you can probably tell by the not-so-straight parts) but it seems to be appropriate for the activities of the day. We may or may not change it up for the remainder of the week. I'll be sure to let you know if we do!

Sorry about the quality of the pictures when she's in costume - I snapped them with my phone just before she went out the door.

Monday, May 9, 2011

Simple Style - Cornrows and Box Braids

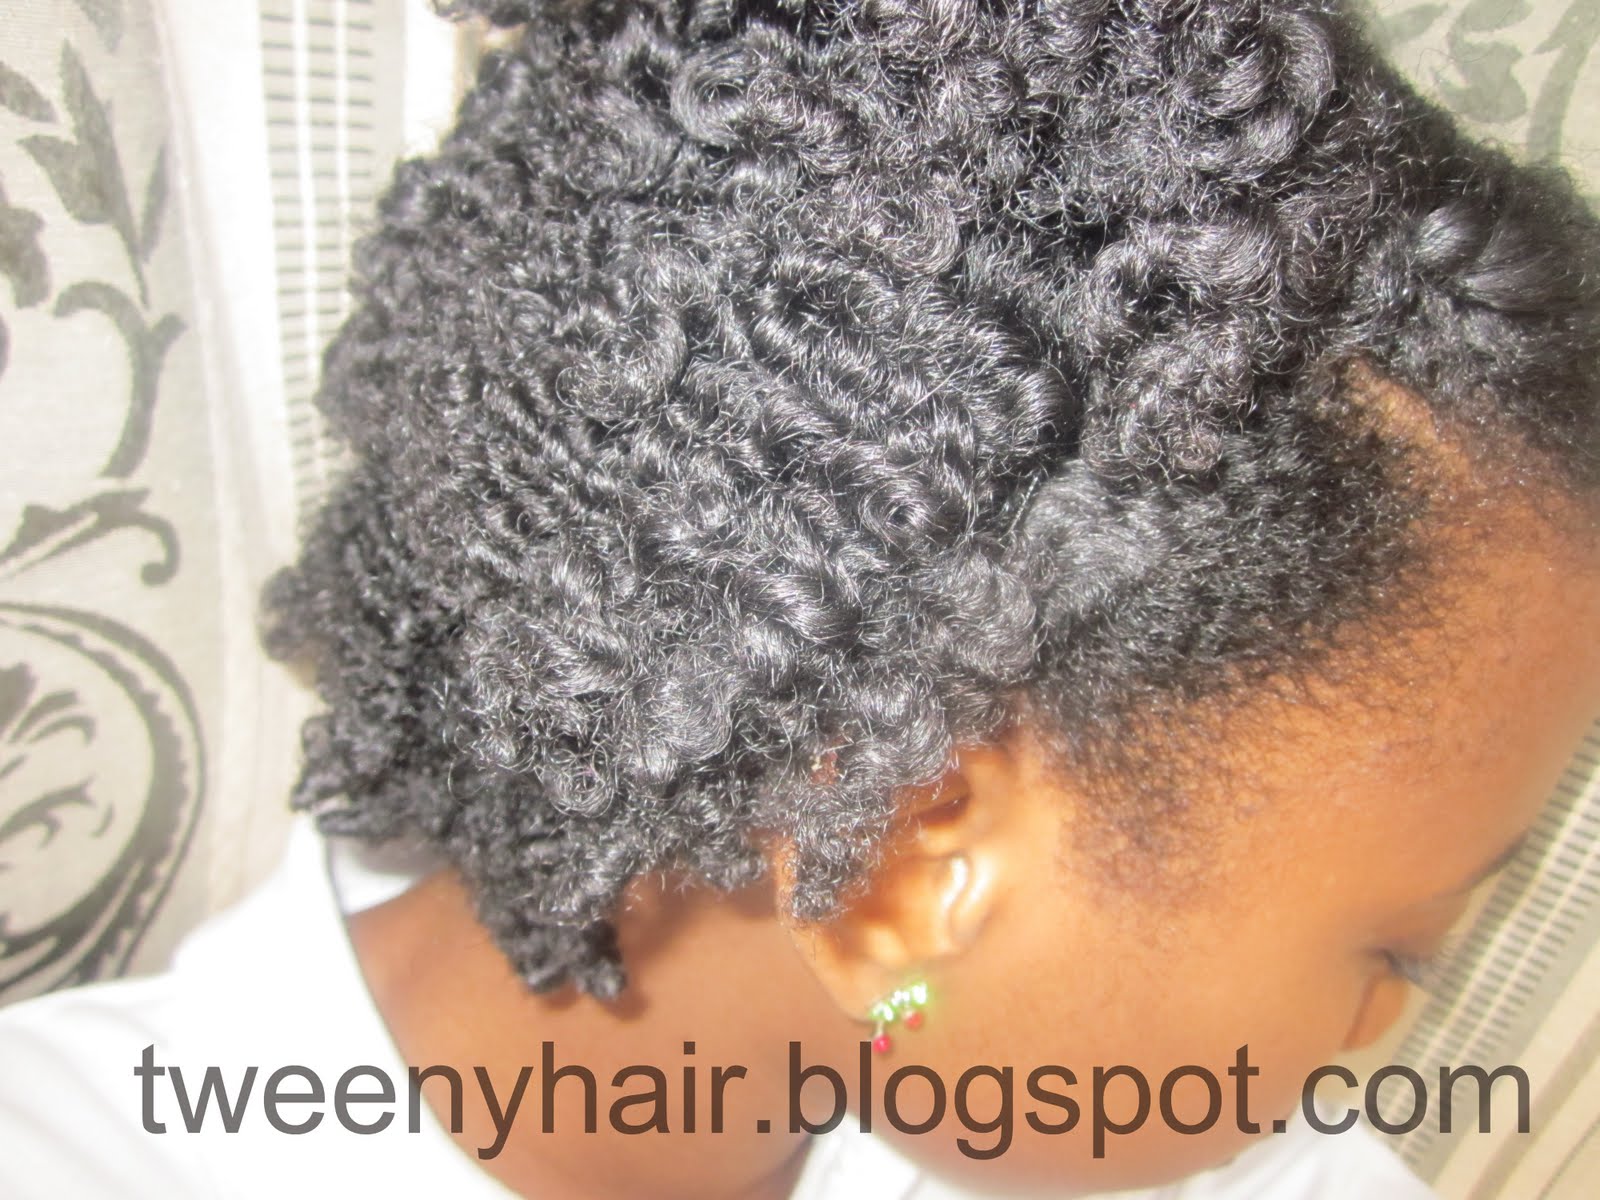
I know I haven't posted many hairstyles lately. Truth be told, we've been so busy around here that we've been mostly doing simple twists, braids, and their respective "outs".

Tonight I was getting ready to do some twists so she can have a twist out tomorrow, but then I remembered that there are supposed to be storms almost every day this week. I had just under an hour before we had to leave the house, so I couldn't do anything too time consuming. I sat down, comb in hand, without a plan but knowing that I needed to do a style that is quick, will last the rest of the week, and will hold up through walks to and from the bus stop in the wind and rain. That's not asking too much, right? LOL!

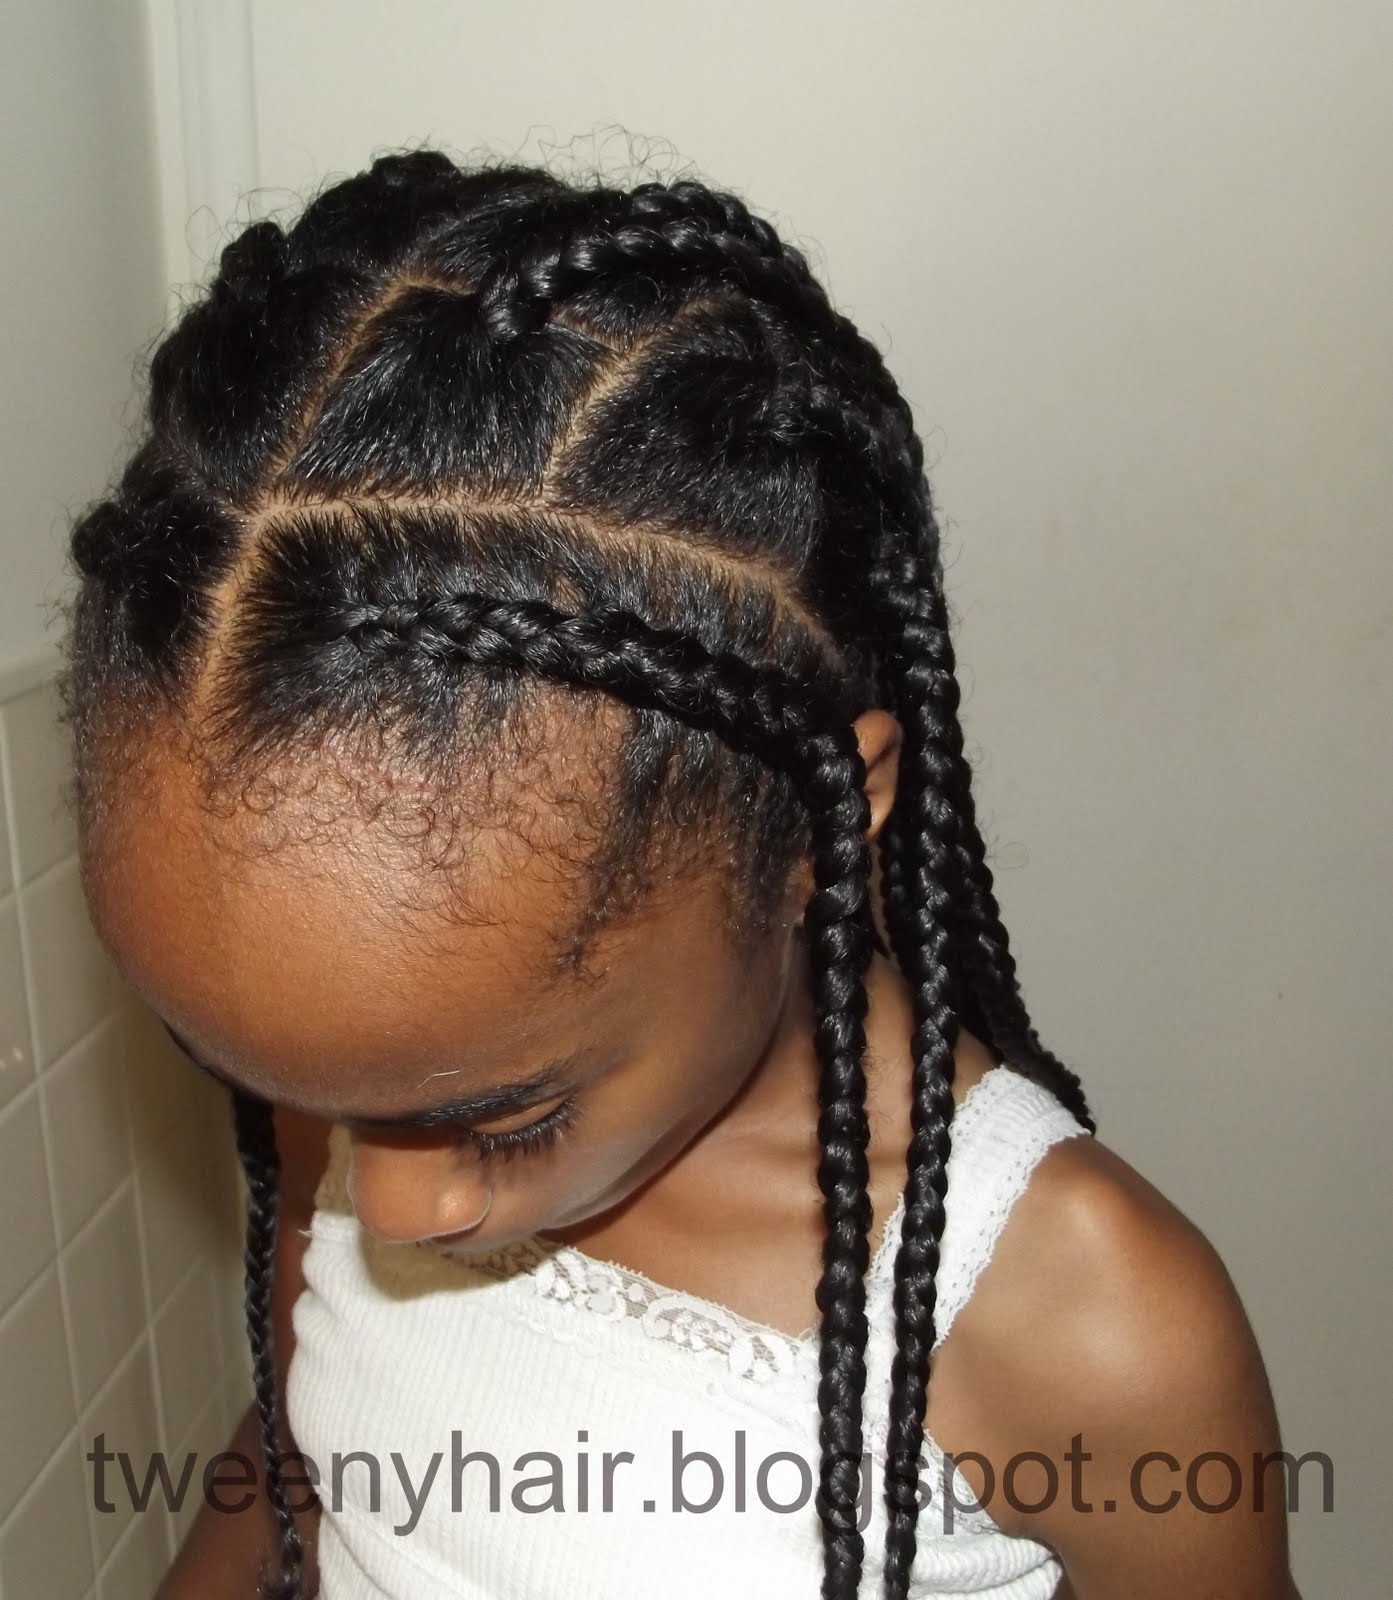
Here's what we came up with:

Syd's hair had previously been in 2 thick cornrows, so it was already slightly stretched and still pretty much completely detangled (thank goodness!). I made two cornrows at a slant from the center front of her hair down to just above her ears.

After that, I put the remaining hair into relatively big box braids. There are 24 braids back there all together. To make the style look a little more polished and less "kiddy," we pulled all the braids into one low ponytail and added Syd's favorite big flower.

We snapped a couple pictures and were out the door with about 10 minutes to spare!

She'll probably change the location of the ponytail (higher, to the side, etc.), braid the ponytail, and change the accessories throughout the week. Being able to change things up makes her happy and allows her to put her own stamp on her hair.

Now that Syd has outgrown so many of the quicker styles she used to love, I think I need to come up with a few that are fast and have a bit of staying power. Do you have a specific go-to style for when your time is somewhat limited?

Sunday, May 8, 2011

Happy Mother's Day!

I've been organizing old photos all week, so for Mother's Day I thought I'd share some of my favorite mommy moments throughout the years.

Hugs from my baby on her first Christmas

Love those little girl giggles!

Getting ready for her first ride on an Amtrak

Pouting after our favorite Supercross rider lost a race. :D

"Pleeeeease, mom?"

Staring each other down for no good reason :)

Riding the inclined railroad in Chattanooga, TN

Getting ready to run a 5K together

 
This one's a favorite just because she looks so pretty. :)

HAPPY MOTHER'S DAY!

Friday, May 6, 2011

Sharing the Spotlight: A Tip from Chelsea

Today's Sharing the Spotlight contribution comes from Chelsea from Curly and Young. Not only is she sharing one of her styles, she is sharing with us a wonderful tip to remember!

Chelsea says:
"This post is not so much about my hair style as it is about the styler that I used.  This style is a very simple dry braid out. I achieved it by detangling my hair using my wide toothed comb and tangle teezer.  I then applied my favorite styler and braided my hair.  The following day I unbraided my hair, separated the pieces and fluffed for fullness. I pulled my hair back by splitting my hair down the middle and separating the two sections into halves so that I had four sections in all. I then twisted all of the four sections and secured them with slides."


Chelsea goes on to say:
"What is my favorite styler you may ask? Aloe vera gel!!  This gel provides me with soft yet touchable hold that is long-lasting and best of all it is all natural. I felt it important to share this little tid bit because as a blogger who caters to young women I am often asked for product recommendations that are all natural and most importantly cheap, after all most young women do not have deep pockets. I hope this helps a young curly out there."

Thank you so much, Chelsea, for sharing! The style is simple enough for tweens/teens who are learning to style their own hair and using Aloe vera gel as a styling aid is wonderful! Everyone be sure to swing by Curly and Young to see more of Chelsea's styles and tips!

If you would like to see one of your styles featured on Sharing the Spotlight, click on Contribute at the top of the page to find out all the details!

Thursday, May 5, 2011

Veil Style Twist Out


After wearing the veil style with twists for the last few days, Syd's twists were starting to look pretty fuzzy. We decided that we would go ahead and remove the twists before school this morning so she could wear a twist out for the next couple days.


As soon as the twists were removed, Syd ran to her room to get her favorite hat. Luckily, her teacher allows the kids to wear hats in the classroom, so she went to school with her hair down and a hat on her head. For some reason, that combination always makes her feel great. :)

Tuesday, May 3, 2011

Veil Style on Three Heads


I apologize up front for the poor quality of the pictures in this post. I was not at home and didn't have my camera with me, so these pictures were taken with a phone.

Syd and I went to relative's house the other day and I ended up with 3 girls (Syd included) wanting their hair done. I made it easy on myself and chose a simple style, and then I did that same style on all three girls.

I settled on a basic veil style for the girls. I parted out three boxes across the front of their heads. Each box in the front row is gathered into a rubberband and split into 2 braids. Then I parted out a row of four boxes behind the row of three. The braids from the front row are brought back and joined with the hair from the second row.

After finishing that part, the rest of the older girl's hair was put into twists. She is growing out her pretty damaged hair, so I twisted her hair in order to give her curls a uniform look. She is only wearing the twists overnight so she can have a twist out for school in the morning. Sadly, I don't have a picture of the twist out, since I won't see her again for a week.


Next was Syd's hair. The back of her hair is in twists, too, but she'll probably keep the twists in for a few days and then wear the resulting twist out for a few more days.


The younger girl's hair wasn't twisted. She has thin hair with a looser curl pattern and it looks AMAZING with just a little bit of product. I added some Shea Moisture Curl and Style Milk and she was good to go.


It was kind of fun doing the same style on three girls with three different hair types and lengths, but it reminded me just how much hair Syd has. Her hair took so long compared to the other two girls with shorter, thinner hair!

In the end, all three girls were pleased with their styles. And the more I think about it, the more I realize that making three girls (ages 10, 11, and 13) happy with the same style is kind of like a small miracle. LOL!

Monday, May 2, 2011

Curlformers Style for a Wedding


Syd and I went to a friend's wedding the other day, and Syd wanted something "pretty." So we just did a basic Curlformer set. I own 46 Curlformers and we used every single one of them on her hair. I would have used more if I had them. I like the curls look when using smaller amounts of hair in each Curlformer.

Last time I used the Curlformers was before Syd's hair was before her haircut and I had to twist the part of her hair closest to her scalp because her hair was too long to fit into the Curlformers. This time, there was only an inch or two that didn't fit, and the Curlformer weighed it down enough to make it all work.


When we removed the Curlformers, we added a headband with a big flower, but apparently I only took a picture BEFORE we added accessories. Oops!


To preserve the curls overnight, we pull her hair into a loose ponytail on the top of her head (also known as pineappling) and she sleeps on her satin pillowcase.

LinkWithin

Related Posts Plugin for WordPress, Blogger...